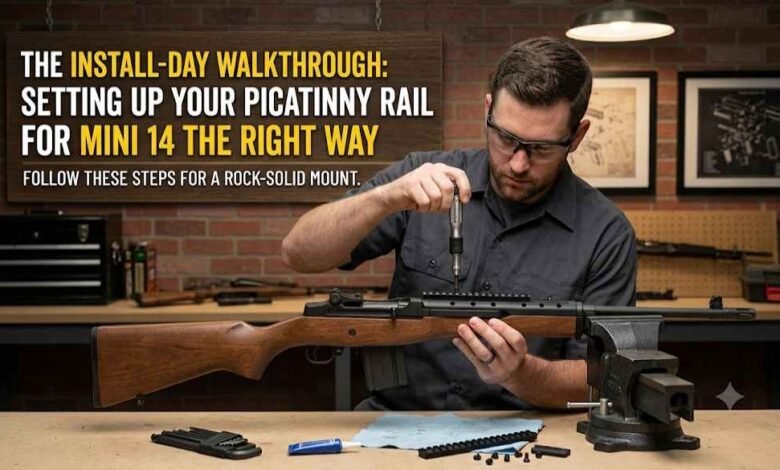
Buying the right rail is only half the job. The other half happens on install day, when the rail goes onto the rifle and the quality of the work determines whether the setup performs the way it should. Plenty of shooters spend good money on quality hardware and then undercut it with a rushed, careless installation. The rifle never shoots as well as it could, and the owner never realizes the problem was the process, not the parts.
Installing a picatinny rail for mini 14 is well within the ability of most owners, but it rewards patience and attention to detail. A careful installation creates a stable foundation that holds zero and supports the optic for the long haul. A sloppy one introduces problems that are frustrating to diagnose later. This walkthrough covers the mindset and the steps that separate a clean install from a careless one.
Why Installation Quality Matters as Much as the Rail
A rail is a precision component, but it can only perform as well as its installation allows. Every contact point, every screw, and every alignment decision affects how the rail interacts with the receiver and how the optic behaves under recoil. An excellent rail installed poorly will underperform a modest rail installed well.
The good news is that a careful installation does not require special talent. It requires the right tools, a methodical approach, and the discipline to not rush. Most installation problems come from skipping steps or guessing at things that should be measured.
Gathering the Right Tools Before You Start
Nothing derails an installation faster than discovering halfway through that you are missing a tool. Before you begin, gather everything you need so the process can flow without interruption.
The Essential Tools
A quality set of hex or Torx drivers that fit the rail hardware exactly is the foundation. Ill-fitting drivers strip screw heads and ruin an otherwise smooth install. A torque wrench or torque driver is just as important, because guessing at torque is one of the most common installation mistakes.
Supporting Supplies
A thread-locking compound appropriate for firearm use helps keep screws from backing out under recoil. A bubble level or optic leveling tool helps ensure the rail and optic are aligned correctly. A clean cloth and some solvent let you prepare the mounting surfaces properly.
Preparing the Rifle and the Mounting Surfaces
A clean, properly prepared surface is the foundation of a stable installation. Skipping this step is one of the easiest ways to undermine an otherwise careful job.
Clear and Safe
Always begin by confirming the rifle is unloaded and safe. Remove the magazine, check the chamber, and keep the rifle pointed in a safe direction throughout the process. There is no part of an optic installation that should happen with a loaded firearm.
Clean the Contact Points
Wipe down the receiver mounting area and the underside of the rail to remove oil, grease, and debris. A clean interface allows the rail to seat properly and prevents contaminants from creating tiny gaps that can lead to movement later.
Step-by-Step Installation
With the tools gathered and the surfaces prepared, the installation itself becomes a straightforward sequence. The key is to move through it deliberately, confirming each step before moving to the next.
Step 1: Test Fit the Rail
Before applying any thread locker, set the rail in place and confirm it fits the receiver cleanly. Look for even contact and confirm that the screw holes align properly. This dry fit catches problems before they become permanent.
Step 2: Apply Thread Locker
Apply a small amount of thread-locking compound to the screw threads. A little goes a long way. The goal is to keep the screws from backing out under recoil, not to glue the rail in place permanently.
Step 3: Seat the Screws by Hand
Start each screw by hand to avoid cross-threading. Getting the threads started cleanly is far easier by hand than with a driver, and it prevents damage to the receiver threads.
Step 4: Torque to Specification
Tighten the screws gradually in a cross pattern, working toward the manufacturer’s recommended torque value. A cross pattern distributes the clamping force evenly and helps the rail seat consistently. Reaching final torque in stages is better than fully tightening one screw before moving to the next.
Step 5: Verify Alignment
Once the rail is torqued, confirm it is level and properly aligned. This matters because the optic that goes on top of the rail depends on a level foundation to produce accurate, repeatable results.
Read Also: Common Scope Mounting Mistakes and How to Avoid Them
Installing and Leveling the Optic
With the rail securely mounted, the optic installation follows the same careful approach. A level optic on a level rail is the foundation of consistent accuracy.
Mount the rings or optic to the rail, position the optic for proper eye relief, and use a leveling tool to confirm the reticle is square to the rifle. Then torque the rings to specification using the same gradual, cross-pattern approach. Take your time with leveling, because a canted optic creates accuracy problems that grow worse at distance.
Common Installation Mistakes to Avoid
Even careful owners can fall into a few common traps. Knowing them in advance makes them easy to avoid.
- Over-torquing screws, which can strip threads or damage hardware
- Under-torquing screws, which allows movement under recoil
- Skipping thread locker and finding screws loose after a few sessions
- Failing to level the optic, which creates a canted reticle
- Using ill-fitting drivers that strip screw heads
- Rushing the process instead of confirming each step
Confirming the Work at the Range
The final step of any installation happens at the range. A careful install should produce a rifle that zeros predictably and holds that zero across sessions. Take the rifle out, zero the optic, and then shoot enough to confirm the zero is stable.
After the first range session, it is worth re-checking the torque on the rail and ring screws. Sometimes a screw will settle slightly after the first round of recoil, and a quick verification catches it before it becomes a problem. Once the setup proves stable across a couple of sessions, you can trust it.
Final Thoughts
Install day is where a quality rail either becomes a stable foundation or a source of future frustration. The difference comes down to preparation, the right tools, and the discipline to work methodically rather than rushing to get the rifle on paper.
A carefully installed picatinny rail for mini 14 rewards the effort with consistent accuracy, reliable zero retention, and an optic that performs the way it was designed to. The parts matter, but the process matters just as much. Take the time to do the installation right, and the rifle will reward you with the kind of dependable performance that careless installs never quite achieve.